
I want to share a quick story with you that will help explain why so many people do endless intervals and high-intensity workouts and yet never really have the conditioning they should…
A few years ago, I was in NYC doing a workshop for a group of trainers at Equinox.
I scheduled a helicopter flight around the city after the first day of speaking. NYC obviously has a ton of historic buildings and things to see, so I was really looking forward to it.
So I was more than a little disappointed when I spent 45 minutes sitting in the helicopter while the pilot tried to get it started.
First, he thought it was flooded. Then he decided there was something wrong with the fuel pump. Or maybe it was the electrical system.
Finally, after spending a ton of time trying (and failing) to start the helicopter, the owner of the company stepped in and said they could get it fixed (whatever it was)… but it would take an hour or two.
I had already driven over an hour to the airport and it was my only night in town, so I told him I’d wait. He gave me a car to use and pointed me in the direction of some local restaurants.
Just about the time I was ordering my food, I got a call that the helicopter was ready to go. Only twenty minutes had passed since I’d left the airport.
When I got back and asked how they had fixed it so quickly, the owner looked slightly embarrassed.

Flying by the empire state building...hours later
It turned out that there wasn’t anything wrong with the fuel pump, the electrical system, or anything else complicated. Instead, the helicopter wouldn’t start for one simple reason: the pilot had forgotten to turn the fuel shut-off valve to the on position.
Since the valve was turned off, the helicopter wasn’t getting any fuel. This is why no matter what the pilot tried, it just wouldn’t start.
It doesn’t take a mechanic to realize that engines need fuel to run. The pilot simply hadn’t realized the the valve was turned off, or thought to check it, because it’s normally left on.
A ton of time had been wasted because of what was ultimately a rookie mistake, but there’s a valuable lesson that can be learned from it.
In order to fix something, (whether it’s a helicopter or your conditioning) you have to to understand where the limiting factors are and what’s really broken… or else you’ll just end up wasting time.
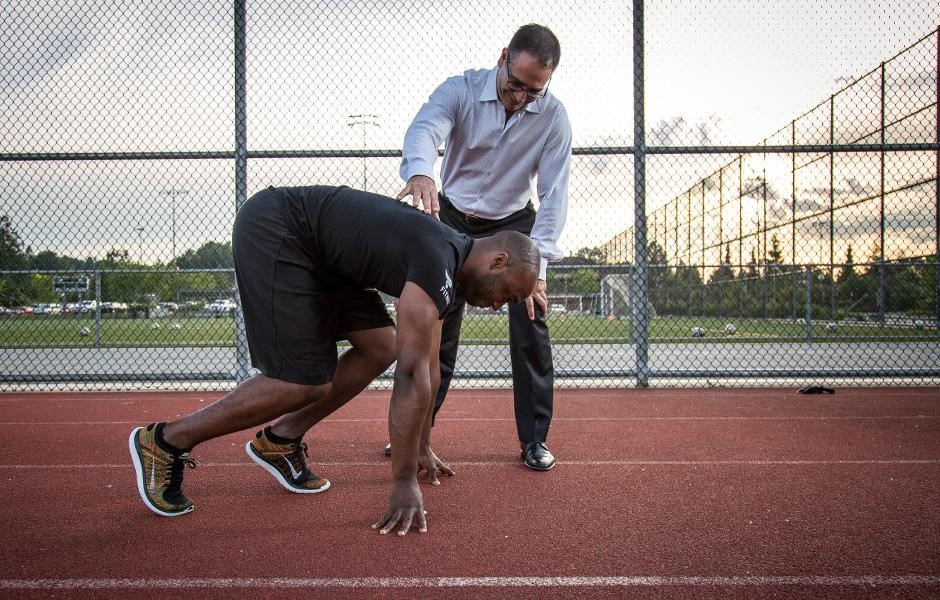
This is the reason why every conditioning program needs to first start with a conditioning assessment.
The problem: most people don't know how to assess their conditioning
Nine times out of ten, people decide to work on their conditioning only after something happens that makes them realize that their gas tank isn’t what it needs to be.
A fighter gasses out in the last round.
A team sport athlete falls apart in the fourth quarter.
An endurance athlete struggles to make it to the finish line.
A CrossFitter gets crushed on the last day of competition.
You get the idea.
Not many people work on their conditioning because they really want to. They do it because they realize they have to.
Figuring out that your conditioning sucks and needs work is the easy part. Getting to the bottom of why it sucks (and knowing what to do about it) is the hard part. This is where most people struggle.
Conditioning has far more moving parts than strength. It’s not a single fitness quality—it’s the end result of many different components working together at the same time:
- Energy systems
- Neuromuscular endurance
- Movement capacity
- Skill and technique
- Mental performance
Your conditioning will pay the price if any of these areas are weak, broken, or underdeveloped.
This is why the conditioning assessment is so important. The entire goal of an assessment is to pinpoint your weaknesses so you can train to make them stronger.
Just like a helicopter won’t fly (or even start) if it’s not getting any fuel, your body won’t perform if any of its systems aren’t doing their job effectively.
This means that if you want to improve your conditioning, you have to first pinpoint your limiting factors.

Why conditioning programs often fail to improve conditioning
Most conditioning programs don’t use any sort of real (or effective) assessment to figure out where the weak links are. If there is an assessment, it often only measures energy systems.
Energy systems are important, but they are just one piece of the conditioning puzzle.
Think of what would happen if you took your broken-down car to a mechanic who just started throwing random parts in it without first finding out what was wrong.
How well do you think that would work?
You probably wouldn’t be too happy wasting a bunch of time and money. You’d likely take it to a better mechanic next time—one who actually plugs the car into a computer to get the error codes and diagnose the problem first.
And yet when people’s conditioning is broken, they often think it’s because they didn’t train hard enough, or they didn’t do enough intervals, or whatever.
Instead of digging deeper to find the underlying cause, they try to treat the symptom by training harder and doing more.
Here’s why that rarely works: if what they were doing before wasn’t improving their conditioning, then doing more of it (or going harder) probably won’t fix the problem either.
It’s just going to waste more time and energy.
This is why it’s so crucial to start with an effective, highly-targeted conditioning assessment. Then you can laser in on precisely why your conditioning is failing in the first place.
The only way to build a conditioning program that actually fixes your broken conditioning is by using the information from this type of assessment.
The BioForce Conditioning Assessment
To give you an idea of what your assessment should look like (and give you something you can go try right now), I’m going to share a basic outline of the assessment I teach as part of my BioForce Conditioning Coach Certification.
(If you’re a coach and you’re not already on my Insider’s List to save $200 on the Certification when it reopens, click here to learn more now)
I created and refined this assessment to give coaches a simple, yet powerful, way to assess conditioning and pinpoint weaknesses. I also wanted to make sure it didn’t take hours to do or require a PhD to understand.
The end results is a series of tests that answer the most important questions about all the different parts of your conditioning:
- How well developed are your different energy systems?
- How quickly can you recover in between work periods?
- Which muscle groups have the best endurance?
- How effective are you at managing and controlling your energy?
- Which muscle groups have the worst endurance?
- How efficient are your breathing patterns?
- What does your movement capacity look like?
- How do your movement patterns change as you get tired?
The BioForce Conditioning Assessment I teach is broken up into four different primary components. Each one is designed to evaluate a different area of conditioning to give you a complete picture:
- Breathing and mobility
- Energy system development
- Muscular endurance
- Fatigued movement screen
Because the fatigued movement screen is a part of the muscular endurance test, that means there’s three separate tests that you’ll need to complete. Excluding the warm-up and cool down, the entire assessment should take less than 20 minutes.
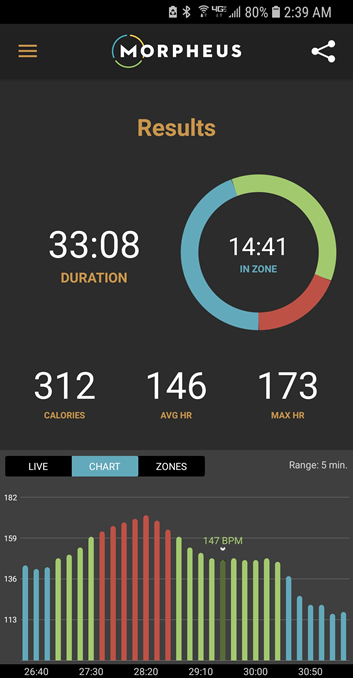
I highly recommend you use a heart rate monitor to properly assess energy system development (I use my own Morpheus app) but there’s no other equipment necessary.
Here’s how to do it
The conditioning assessment starts with a quick evaluation of your breathing patterns and your general mobility.
What does breathing and mobility have to do with conditioning?
A lot, actually.
What most people don’t realize is that inefficient breathing patterns will inevitably lead to reduced mobility, increased energy expenditure and even slower recovery.
Many people’s conditioning problems start with inefficient breathing patterns and a lack of effective mobility. Because they don’t incorporate these two areas into the conditioning assessment, they often miss this hugely important connection.
This is why it’s important to start the conditioning assessment with two specific tests I picked up from Mike Robertson and Bill Hartman of iFast:
- Infrasternal angle test
- Hip adduction test
You can see a quick video below of how to perform the Infrasternal angle test (as well as a couple of breathing exercises)
For the Hip Adduction test, start by laying on your side with knees bent in a 90/90 position. Extend the top leg until it’s in line with your body as seen in the picture below and see how far you can adduct the hip (drop your knee down towards the table.
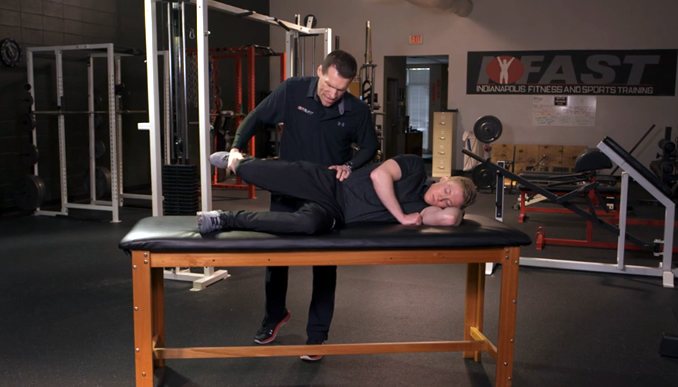
To pass the test, your knee should be able to make it all the way to the table. If it can’t, it’s likely connected to inefficient breathing patterns. This is something that you’ll definitely need to fix if you want to improve your conditioning.
The energy of conditioning
Energy systems are something a lot of people find confusing and complicated. The truth is that if you dig deep into all the details of human metabolism and the different pathways the body has to create energy, it is complicated.
But that doesn’t mean that you have to be a rocket scientist to get a good gauge of your overall energy system development.
If you’re a professional athlete with millions of dollars at stake, it’s valuable to test for markers like VO2 max, power at anaerobic threshold, etc.
For everybody else, I recommend using a test that gives you as much information as possible with the least amount time and work. Think of it as getting the most bang for your assessment buck.
To do this, you’ll use the following tests:
- Resting heart rate and heart rate variability
- 1.5 mile run
- 60-second heart rate recovery
Resting heart rate and heart rate variability are two general fitness markers that correlate broadly to a range of conditioning qualities.
![]() This is because they are closely tied to aerobic energy production and even more, the ability to recover quickly in between work periods.
This is because they are closely tied to aerobic energy production and even more, the ability to recover quickly in between work periods.
For general fitness goals, a resting HR in the low 60's and HRV score in the upper 70's is a solid foundation. The majority of athletes should aim for a heart rate rate in the low to mid-50’s and an HRV score in the 80’s.
You can measure and track both of these in just a couple minutes a day with Morpheus. This is a highly effective way to both assess your conditioning, and see how well it’s improving over time.
Why a 1.5 mile run?
Three reasons...
First, this is a basic variation of the Cooper’s test and research shows that it’s generally pretty accurate for estimating your VO2 max based on your age, gender, and the total distance covered.
You can check your numbers by plugging them into this results calculator.
Second, all you need is a treadmill, a track, or just a pedometer like a Fitbit to calculate distance. This makes it easy for just about anyone to do.
Quick note: As long as your fitness allows it, I recommend running for 1.5 miles. If you can’t run due to injuries or some other reason, you can use a bike instead. However, you can't compare yourself to established norms if you choose to bike.
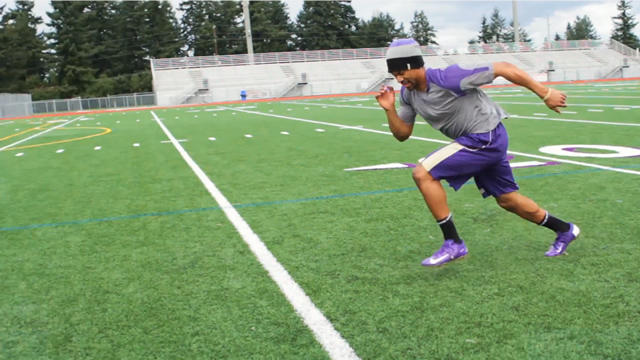
The final reason to use the 1.5 mile run test is to assess your mental performance.
How well do you handle the final minute or two? Do you let yourself slow to a crawl as you fatigue? Or do you push yourself from beginning to end?
Evaluating your ability to tolerate fatigue and maintain focus, technique and power output is also important in finding your conditioning weak points.
As soon as the test is complete, you’ll want to immediately note where your heart rate is at. From there, check it again after one minute and record the difference.
This is known as 60-second heart rate recovery and it’s a hugely important piece of the conditioning puzzle. When you can bring your heart rate down quickly, it’s a sign that your aerobic energy system is doing more of the work.
This means you’ll have a much easier time maintaining your power and avoiding fatigue. A drop of about 20 beats per minute is average. Anything less than that is poor and anything about 40 is good and what you should be aiming for.
The Fatigued Movement Screen
The final step in the BioForce Conditioning Assessment is to transition from the 60-second recovery period after the 1.5 mile run immediately into three specific tests of maximum muscular endurance:
- Push-ups
- Pull-ups
- Plank
The key here is to perform all three tests without resting in between. The goal is to both see how many reps you can get and how fatigue changes your movement quality.
Why does this matter?
Because as you fatigue, you will change your movement. That’s a given. But exactly how you change it can dramatically impact your conditioning and performance.
Does your movement and technique completely fall apart? Or can you continue to push yourself to the edge and yet still keep it together?
The difference between the two is a skill and it’s one that you can learn.
You can determine if you have this skill by looking at your movement patterns during the three muscular endurance tests.
Either have an experienced coach grade your movement, or record a video and do it yourself. I recommend using a scale of 1-5 and grading different components of your movement quality such as:
- How well can you maintain your posture and body position - the alignment between your hips, knees, ankles and shoulders?
- Are you able to stay symmetrical, or do you favor one side over the other?
- Do you continue to use the proper range of motion, or do you shorten it?
- Can you maintain a neutral spine and good core stability, or does it quickly break down and impact your technique?
It's important to see how many reps you can get in after you're already tired from the 1.5 mile run, but the test is even more valuable when you also look at movement.
Movement is ultimately what drives the need for energy. The more efficiently you can maintain your movement quality over time, the better your conditioning will be.
It really is that simple.
Putting the pieces together: what does it all mean?
In less than 20 minutes, the BioForce conditioning assessment will help you identify your biggest conditioning weaknesses.
To figure out where the weak points in the chain are, just look at your performance in each of the tests. Nine times out of ten, you’ll find at least 1-2 areas of the tests where you performed worse than others.
Perhaps your resting heart rate and heart rate variability aren’t what they need to be. Maybe your heart rate didn’t come down nearly fast enough after the 1.5 mile run.
Or you couldn't hold a plank more than 30 seconds after you completed the previous tests. It’s one thing to have a strong core when fresh. It’s something else entirely to maintain core strength even when you’re exhausted.
What to do next
Once you’ve identified your biggest conditioning limiting factors, the next step is to put together a program designed to fix them and get to work.
If you’re a coach, the best place to learn how to put all the pieces together and write game-changing conditioning programs is with my BioForce Conditioning Coach Certification.
The next course opens in June, 2020 for a limited-time only. Sign up for my Insider’s List below to save $200 and get the chance to register before anyone else.
If you’re not a coach and need some help figuring out how to build your own conditioning program, I recommend you start by reading through some of my other articles on programming below:
- How to write a world class conditioning program in 15 minutes or less
- The Ultimate Conditioning Guide
- How to combine strength AND conditioning